Uncategorized

Amy Butler Staple Dress

Well, since I promised another blog post on the Staple dress (and I was wearing it today!) here goes…

IMG_20140807_123055

This is actually the second staple dress I made, my first was a midweight denim fabric I scored at a yard sale for $5.  In other words; fabric I wouldn’t be upset about wasting on a muslin.  I may or may not ever wear it- but it worked for testing out the pattern and size before cutting in the fabric I really wanted to use…this beautiful Amy Butler voile (Josephine’s Bouquet in Ink).  I had been eyeing this fabric online for over a year and finally gave in and ordered it from fabric.com when it went on sale.  Sadly they don’t seem to have it anymore.  I only had 2 yards but since it is a generous 54inches wide I was able to squeak out a Staple Dress out of it.  Or maybe a Staple tunic if you consider it is way too short to wear without pants.  Or my choice: leggings.  My all time favorite staple in my wardrobe!  The leggings I mean…and I guess this Staple dress now as well!  I have worn this at least once a week since I made it last month.  Love it!IMG_20140807_125050

These pics were taken outside the girls swim lessons today, not the most flattering angle being taken from the height of a seven year old…but it was all I could accomplish today and I am still pretty impressed by her photography skills!  Please ignore the wrinkles, sitting outside in the grass watching kids swim isn’t a very glamorous affair therefore I did not iron it.  Not that I ever do.  Ever.  Hmm…maybe keeping my hands in the pockets will hide it.  I love these pockets and don’t know how I never sewed in seams pockets until I bought this pattern and gave it a try.  Funny that both this and my other new pattern for the the Moneta dress both have these same pockets.  Love, love.  IMG_20140807_123145

I am excited that given this shorter length I will be able to wear this into fall and winter with skinny jeans, boots and a cardigan.  I actually think that the shorter lenght works better for my (apple) body shape- showing a little leg is much more flattering for me.  Maybe the cheapness on my part in only buying two yards worked in my favor and will help redeem this pattern for me after all!

Uncategorized

Playing catch up

I’m back!  Where have I been, has it really been over a month since my last post?  Alot has been happening around here, and unfortunately this blog has been completely neglected.  My daily life has changed drastically, and trying to find that ultimate balance of what I HAVE to do and what I WANT to do has been difficult to manage.  The biggest change is that I started working full time in the beginning of December.  Going from being a part time librarian to a full time one has been a bit of a challenge.  I have worked full time before, but this is the first time I have been full time with two kids- big difference!  This has meant I have had to give something up, and this blog was the obvious choice.

Before I chose to return to work full time I contemplated giving up my career and focusing my energy and time into my crafting by opening up my own shop in town, teaching others to express their creativity by learning to sew and supplying them with the fabric choices I have been unable to find locally.  I really wanted to pursue this dream and would spend hours looking online at retail spaces for rent, exploring wholesale fabric options and imagining the layout and decor of my shop.  This may be a dream I pursue one day but not today.  After considering this at length I started thinking about all of the hours I would have to put in, the financial strain it would incur, and the instability and anxiety it would bring to our family.

Being offered a full time job as a Librarian is a big score- jobs in my field are not easy to come by- especially where I live where there are so many unemployed library graduates.  Being offered a full time job as a librarian with an academic schedule (summers off!) with the possibility of tenure are even more sought after.  So, here I am.  A month with no blog post and still struggling with the balance.  This doesn’t mean I haven’t been creating- I have!  I want to use this post to highlight some of the things I have been working on, hopefully it will inspire me to keep posting, and not give up on what brings me joy- this blog and what I choose to highlight on it.

Ok, so here goes-

First- clothing.  My favorite new book for children’s clothing is Happy Homemade: Sew Chic Kids: 20 Designs That are Fun and Unique-Just Like Your Kid! that I purchased from Amazon.  A few days before Christmas I decided to whip up matching dresses for the girls and went with pattern  A a dress with frilled shoulders.  The pattern is very similar to Rae’s Geranium dress, which I had been eyeing for a while but have yet to get around to purchasing!  I chose to go with an unconventional print for a Christmas dress, I wanted something bold and colorful and chose this Amy Butler print reminiscent of a bold floral from the 40’s.  I absolutely love how they turned out and am sure once the weather warms up around here my girls will get more wear out of these dresses…and they worked perfectly to bring a little sunshine to this cold, snowy and miserable winter we have been having around here!

IMG_20140118_150853

IMG_20140118_150932

IMG_20140118_150822

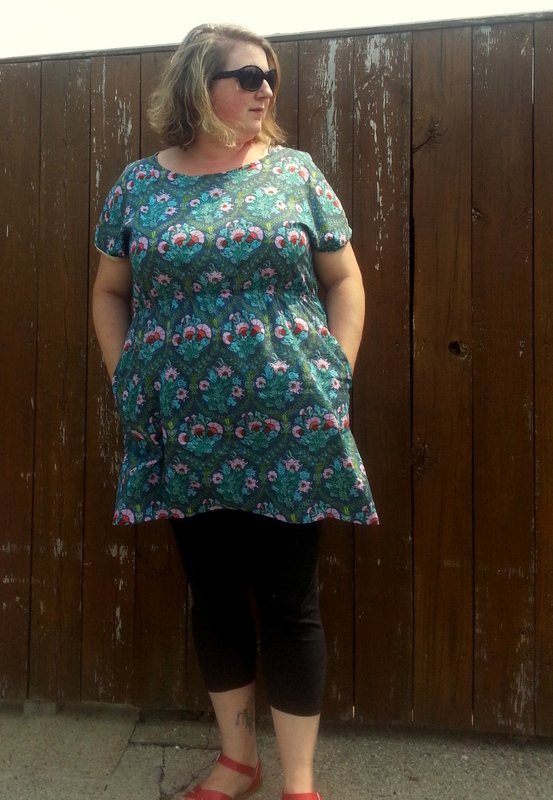
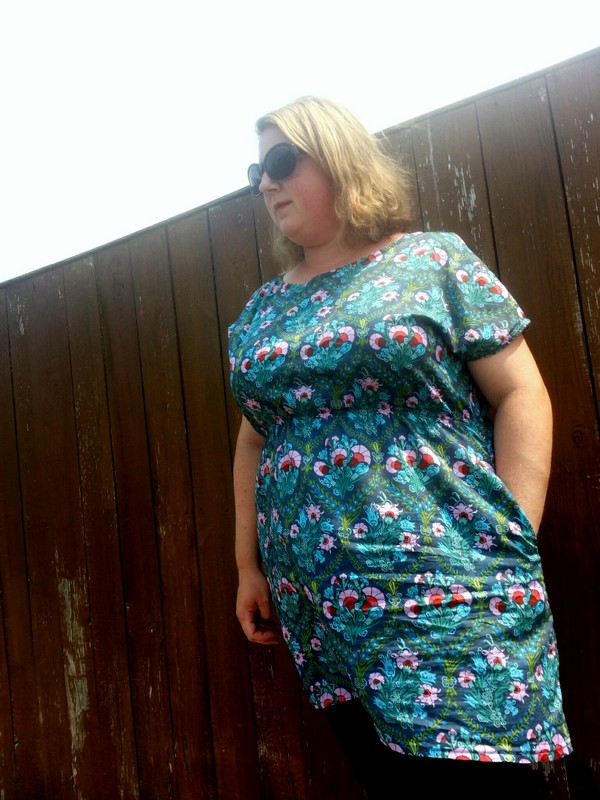
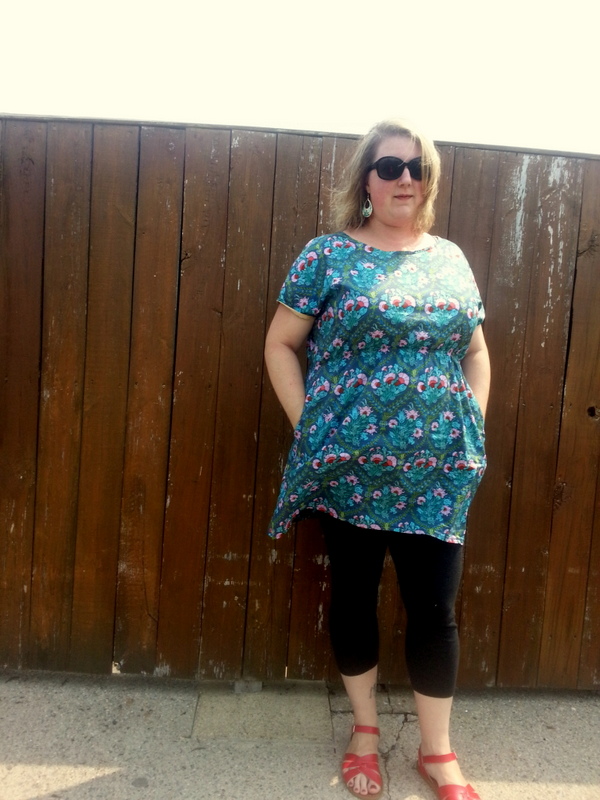
Now for me- I purchased  McCall’s pattern 6744 on sale at Joanns over the summer and never got around to making anything with it.  When I purchased my last order of knit fabric from Girl Charlee for the Queen City Market I did last month I stocked up on a few extra yards of this awesome feather fabric to use for this dress.  I picture myself wearing it with leggings and a light cardigan- so comfortable and easy.  The dress was incredibly easy to make, I whipped it up from beginning to end in less than two hours- not bad.  I found the top to be too large though, and may need to shorten the straps at the shoulders to pull the neckline up a bit- but other than that it is perfect!  I believe I used about 2 yards of fabric so this cost less than $15 to make…so of course I have my eye on a number of knit fabrics to make a few more of these babies…I know what I will be wearing this summer!  The pattern also has options for a maxi dress and a pretty cross over bodice version.  I think for my next version (once I choose a fabric) will be the cross over version in a darker print fabric…but we’ll see.

IMG_20140118_150725

IMG_20140118_150717

I have also been knitting a bit.  I find knitting to be very meditative, and starting a new job can certainly be stressful.  Using the Barley pattern from Tin Can Knits I knit a red hat for Isabel and am working on a Blue version for Eleanor.  This is a simple but interesting pattern, and would be perfect for beginners.  I am planning to make cute pom poms to put on top of each when I am done with Eleanor’s, although this is not in the original pattern I think the girls will like them!

Next post will show the details of Isabel’s birthday party…or should I call it the winter wonderland princess tea party that I am so glad is over?

Simple Summer Sewing Series

Simple Summer Sewing Series Day 2: Reusable Placemats

20130523_093701

Nothing says summer like packing a picnic lunch and heading to the park or playground.  There is something about loading up the picnic basket, blanket and snacks that makes eating lunch outside extra special.  To avoid the inevitable crumbs, spills and “oops” on your picnic blanket (or having your kids eat directly off of the dirty picnic table-yuck) you can whip up these simple, wipeable placemats.  I used a beautiful laminated cotton (Amy Butler- rose, peacock feathers) so there are no worries about stains- just wipe them clean and reuse.  The pocket is perfect for sliding in your cutlery, and the ribbon lets you just roll them up and store them away.  Great to carry around in your purse or diaper bag too- so you’ll always have a clean surface for you or your little one to eat on (with or without a plate!).

20130523_093603

Reusable Placemats Tutorial:

What you will need:

1 yard laminated cotton (57inches wide)

coordinating thread

ribbon or bias tape for ties

How to (use a tiny seam allowance- fabric will not fray):

  1. Cut your fabric pieces.  You should be able to get 4 placemats our of 1 yard.  Dimensions for the placemats are: 10 1/2 x 16 1/2 inches. Cut your pocket pieces: 5×10 inches.  Cut your ties to your desired length- roughly 10 inches (will be folded to form two)
  2. Fold your pocket piece right sides together and sew side seams (to form a 5×5 inch square) leave bottom unsewn and turn right sides out.  Place on top of one placemat piece, one inch from the left botton corner.  Sew sides onto your placemat and sew lines to form slots for cutlery (roughly one inch apart)  You should now have a double thickness pocket with 4 slots for cutlery.  Your bottom edge is still unsewn.
  3. Fold your ribbon in half and baste to center of right side edge.  This will form your ties.
  4. Place one placemat piece on top with right sides facing.  Take your time, do not pin or you will leave holes in your laminated fabric.  Sew around the perimeter leaving at least 2 inches open to allow you to turn it right side out.  Be sure to backstitch at the beginning and end.  Be sure your ribbon is tucked inside.  Turn right side out.
  5. Topstitch all around your placemat, closing up your opening.

Repeat for other placemats and you are done!  Now pack a lunch and get outside before Summer is over!