Simple Summer Sewing Series

Simple Summer Sewing Series Day 2: Reusable Placemats

20130523_093701

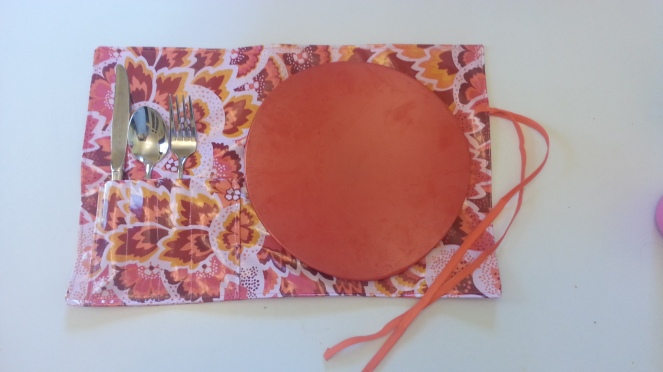
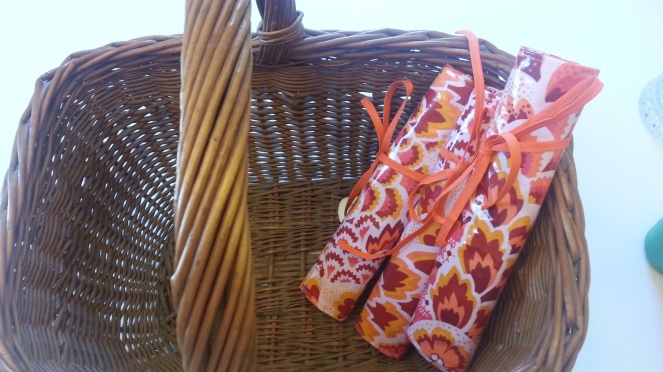
Nothing says summer like packing a picnic lunch and heading to the park or playground.  There is something about loading up the picnic basket, blanket and snacks that makes eating lunch outside extra special.  To avoid the inevitable crumbs, spills and “oops” on your picnic blanket (or having your kids eat directly off of the dirty picnic table-yuck) you can whip up these simple, wipeable placemats.  I used a beautiful laminated cotton (Amy Butler- rose, peacock feathers) so there are no worries about stains- just wipe them clean and reuse.  The pocket is perfect for sliding in your cutlery, and the ribbon lets you just roll them up and store them away.  Great to carry around in your purse or diaper bag too- so you’ll always have a clean surface for you or your little one to eat on (with or without a plate!).

20130523_093603

Reusable Placemats Tutorial:

What you will need:

1 yard laminated cotton (57inches wide)

coordinating thread

ribbon or bias tape for ties

How to (use a tiny seam allowance- fabric will not fray):

  1. Cut your fabric pieces.  You should be able to get 4 placemats our of 1 yard.  Dimensions for the placemats are: 10 1/2 x 16 1/2 inches. Cut your pocket pieces: 5×10 inches.  Cut your ties to your desired length- roughly 10 inches (will be folded to form two)
  2. Fold your pocket piece right sides together and sew side seams (to form a 5×5 inch square) leave bottom unsewn and turn right sides out.  Place on top of one placemat piece, one inch from the left botton corner.  Sew sides onto your placemat and sew lines to form slots for cutlery (roughly one inch apart)  You should now have a double thickness pocket with 4 slots for cutlery.  Your bottom edge is still unsewn.
  3. Fold your ribbon in half and baste to center of right side edge.  This will form your ties.
  4. Place one placemat piece on top with right sides facing.  Take your time, do not pin or you will leave holes in your laminated fabric.  Sew around the perimeter leaving at least 2 inches open to allow you to turn it right side out.  Be sure to backstitch at the beginning and end.  Be sure your ribbon is tucked inside.  Turn right side out.
  5. Topstitch all around your placemat, closing up your opening.

Repeat for other placemats and you are done!  Now pack a lunch and get outside before Summer is over!
Simple Summer Sewing Series

Simple Summer Sewing Series Day 1: Bag Holder

My first sewing series!  Each day this week I will create a project that:

  1. Can be completed in under 30 minutes.
  2. Simple instructions, no more than 5 steps
  3. Use a yard of fabric or less (use up all of those scraps!)
  4. Fit under the umbrella of going “green”.  Good for you, good for the environment, good on your budget.

I am so excited to get started.  Hopefully at least one of the projects this week will inspire you to get sewing!  For more details on this series see last week’s post here.

Day 1:

Our local grocery store sells and encourages the use of reusable bags.  I have purchased over a dozen of these reusable bags over the years- but they always seem to get “lost”.  Lost in the trunk of the car, used for swim class or taken to the library, soccer stuff etc.  Or, simply forgotten in the trunk of the car in the grocery store parking lot!  In other words, I often forget to bring them in or can’t find them and kick myself when I walk out of the store with an endless supply of plastic shopping bags.  I hate throwing them out- it feels so wasteful when they can be saved and used again.  Unfortunately they are not the most attractive looking and can get a bit out of hand- they seem to multiply on their own!  Not the most attractive thing hanging in the kitchen.

DSCN4118
ugly plastic bags

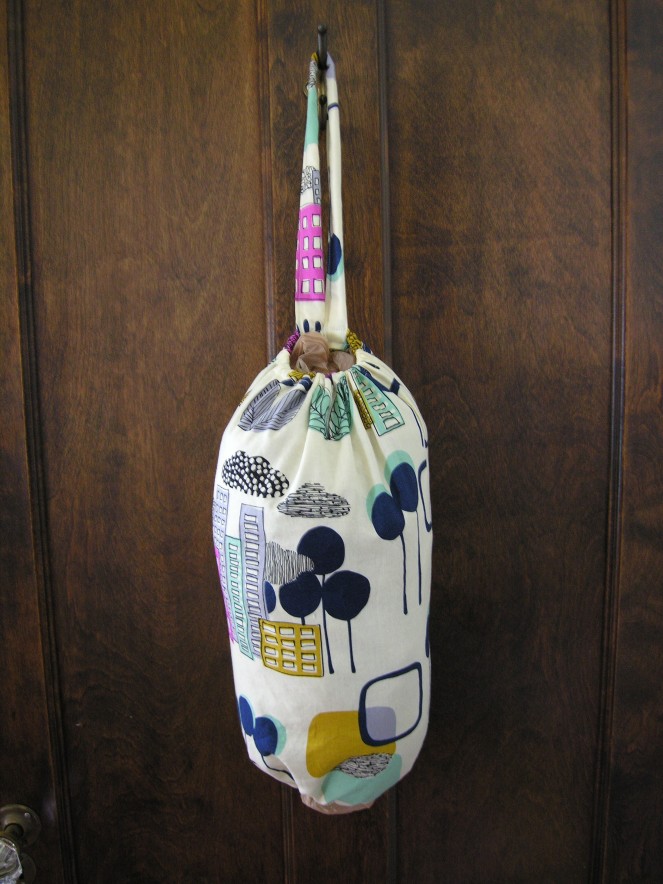
Here comes the Bag Holder.   A great excuse to introduce an awesome fabric into your kitchen and corral those ugly plastic bags.    This is extremely simple and fast to make.  Plus, it looks a bit better hanging in my kitchen!

bag holder
bag holder

You can really make these any dimensions you like, my measurements are just an example.  This is a great way to use up fabric scraps, I actually used the dimensions of my scraps to determine how large I made mine.  Fabric is Alexander Henry Mecca for Moderns- Mercer.

Bag Holder Tutorial:

What you will need:

20x20inches quilting or home dec fabric

coordinating thread

1/4 inch elastic (roughly 9 inches)

How to:

1.  Cut your fabric to desired size.  (My example shows 2 pieces of 10×20 sewn together, had I not used a scrap I would have cut one piece 20x20inches.)

2.  Sew your seam, and finish your edges.  (I chose to use a 1/2 inch seam allowance and pinking shears) If you use one piece of fabric you sew the long edges together to form your back seam.  If you use two pieces like I did, sew up the long sides to form side seams.

3.  Create your casings by folding over the edges 1/4 inch, and again at least 1/4 inch (room enough for your elastic).  Press if necessary, although I just wing it and finger press as I sew.  Sew the casings at the top and bottom of your fabric, leaving 1/2 inch space unsewed to insert your elastic, be sure to backstitch at the beginning and the end.

4.  Cut your elastic in half.  Use a safety pin to insert your elastic through the casing, sew the ends of the elastic together and sew up your openings.

5.  Create your hanging loop by sewing a 2x8inch pieice of fabric together lengthwise.  Turn inside out.  Fold in edges and topstitch.  Fold in half to form loop and sew onto the center back of the bag (you will be sewing it at your center seam if you have one, on the inside of your bag at the elastic casing)

You could also choose to use cotton webbing, or ribbon or a coordinating fabric.  Depending on where you will be hanging your bag you may choose to use a shorter or longer loop.  Adjust as necessary, my door hook is pretty high so I chose to have a longer loop.

Now, stuff your plastic bags in one at a time through the top.  When you need one simply pull one out through the bottom- so easy!  I know these aren’t the clearest directions, but hopefully it makes sense…I will be sure to take pictures during the process next time.

Simple Summer Sewing Series

Simple Summer Sewing Series- Going Green!

How is it August already?  This summer is flying by…where is the time going?  I don’t know about you, but my summer schedule is packed!  With the longer days, warmer weather and two little girls to entertain I am not left with much time to myself…let alone sewing time.  By the time the kids are in bed (sometimes after 9pm!) I am too wiped to sit down and start a project.   I can only spend so much time in front of my sewing machine while the girls run around the house screaming at each other.  Yikes.  Don’t get me wrong, I still sew almost every day but I have to be mindful of how long each project takes…enter- the Simple Summer Sewing Series.  Say that twice fast.  Almost as hard as She sells seashells by the seashore.  I am so corny.

Anyways, I am pretty excited about the projects I am going to show this week; 5 easy and QUICK projects perfect for the beginner sewer or anyone looking for a simple project.  Best part- totally doable in less than an hour (sometimes less than 30 minutes!), so you will never feel guilty staying indoors on a beautiful day locked up in your craft room.  Yay!  Pretty awesome if I do say so myself.

I hope this will become a recurring series, this first one focused on being GREEN; simple projects to satisfy your creative urges and produce something useful and eco-friendly at the same time!

The details:

Day 1:  Bag holder- a pretty disguise and holder for all of those ugly plastic bags you save/recycle.

Day 2:  Reusable placemats- wipeable laminated cotton placemats perfect for a picnic

Day 3: Drawstring bags- self explanatory- fill ’em up with toys, use them for your knitting, etc.

Day 4:  Reusable snack bags- never (well, in an ideal world) buy another plastic sandwich bag again.    Fill them up, eat your snacks, wipe them clean and repeat.

Day 5:  Cloth napkins- go green and add something pretty to your lunchbag at the same time.

So please stop by Monday and check out what I’ve got in store for you.  I can’t wait to get started…already thinking of the fabric for each project.  That’s the best part isn’t it?

Here’s a little preview of day 1!  Gotta throw in at least one picture right?

bag holder
bag holder
Uncategorized

RetroBuffalo…my new etsy shop! Fun Vintage treasures!

Anyone who knows me knows how much I Love, Love, Love to thrift shop.  A bit obsessed I would say.  I am a bit embarrassed when I walk into my local Amvets and the cashier recognizes me or my girls.  Luckily my girls love it too, and get a big thrill out of checking out old toys, or helping me hunt out treasures.  I stop in at least once a week, usually on the hunt for vintage sewing supplies- sewing patterns, fabric and such.  Most of the time I walk out with a bag of unrelated items; clothes for the girls, random toys or books or all of the above.

DSCN4161

I am a sucker for retro children’s illustrations in hardcover books from the past, dainty aprons from the 1950’s, old board games, retro barware.  The list goes on and on.  This passion for sewing and vintage sewing supplies has developed into a love of Vintage domesticity as a whole.  As discussed in this post, the history of a woman’s sewing box or supplies has great meaning to me, and this can be applied to any “old-fashioned” domestic item.  Simpler times, before our culture was so disposable, and things were treasured, protected, mended and appreciated.  The items I have been collecting can fit into this category of “domesticity”.  Everyday items in a woman’s life, that for some reason seem more “beautiful” than what is made today.

DSCN4146

I am so excited to announce my new etsy shop- RetroBuffalo.  I have just started adding items (at the time of this post I have less than 10 up so far!), but please check it out and stop back within the next few weeks as the collection grows.  I will be adding a few special half aprons, vintage sewing patterns, more games and children’s items and more.

Check it out!  www.retrobuffalo.etsy.com